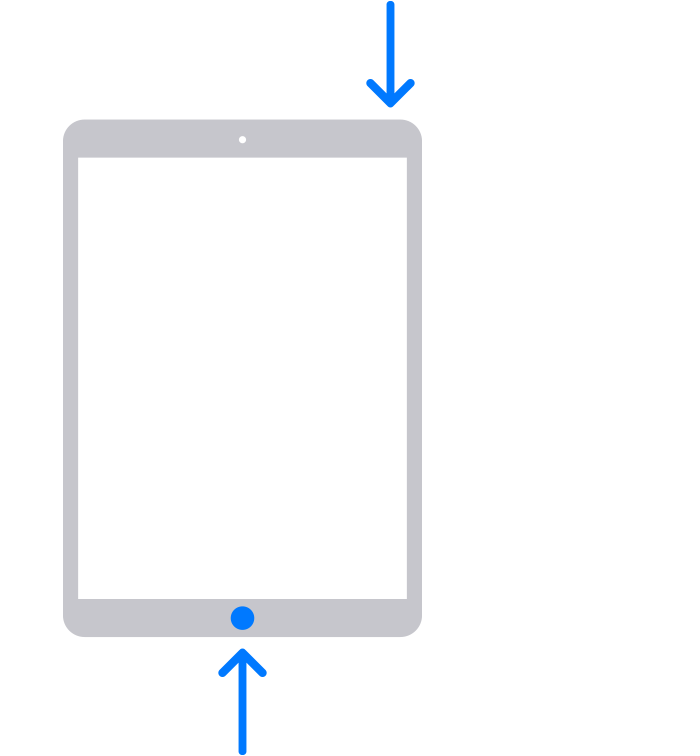
If your iPad or iPhone has a home button at the bottom, simultaneously press and then release the top button and the Home button. A picture will then be captured of your screen and placed in your photos library on your iPad/iPhone.
Tap the screenshot in the lower-left corner, then tap Done.
Choose Save to Photos, Save to Files, or Delete Screenshot. If you choose Save to Photos, you can view it in the Screenshots album in the Photos app, or in the All Photos album if you’re using iCloud Photos.
iPads and iPhones without a home button
If your iPad or iPhone does not have a home button at the bottom, simultaneously press and then release the top button (on the top-right edge of iPad) and either volume button.
Tap the screenshot in the lower-left corner, then tap Done.
Choose Save to Photos, Save to Files, or Delete Screenshot. If you choose Save to Photos, you can view it in the Screenshots album in the Photos app, or in the All Photos album if you’re using iCloud Photos.
Creating a Screen Recording (movie)
Creating a screen recording may be helpful if your problem involves multiple steps and you want to show support exactly what is occuring during that process.
Go into the Settings app then access Control Center.
Tap the (+) symbol next to Screen Recording.
Exit the Settings app.
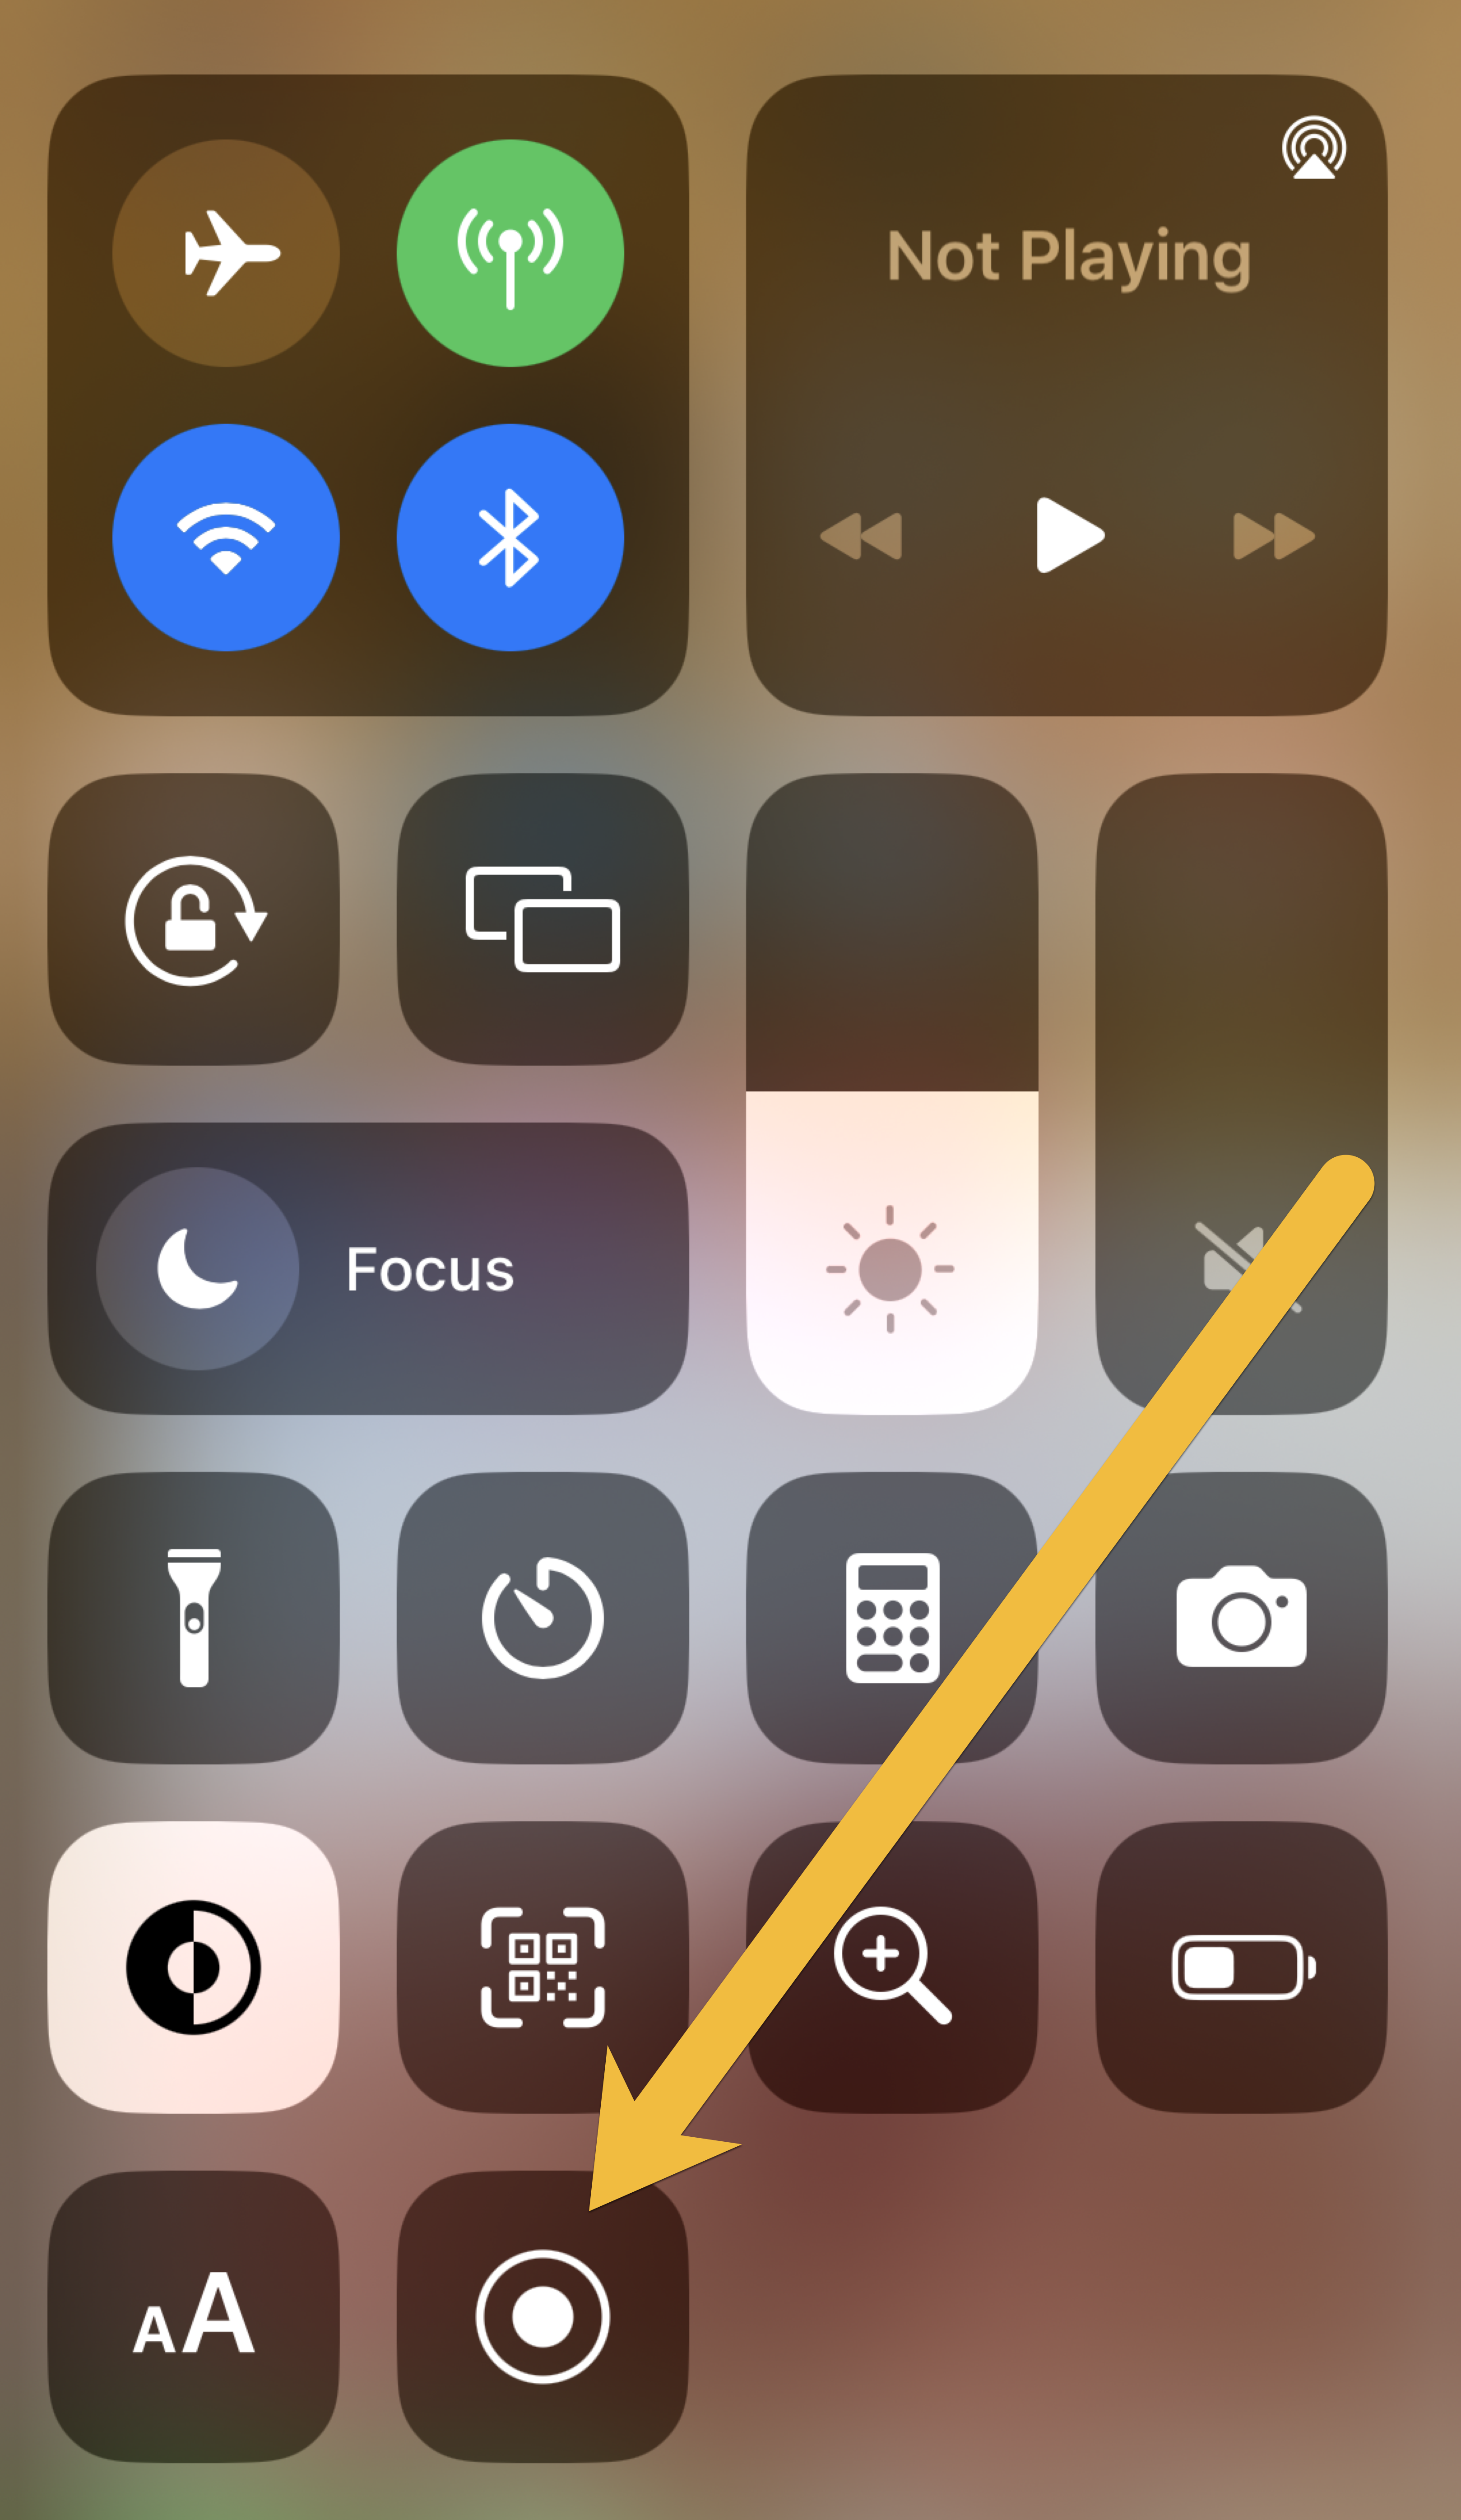
When you're ready to record, swipe down from the upper right corner of the screen to open the Control Center, tap the Screen Recording button.
To stop recording, open the Control Center then tap the Screen Recording button again -OR- tap the red status bar at the top of the screen then tap Stop.
Your screen recording will be saved in the Photos library.
Uploading your Screenshot or Screen Recording
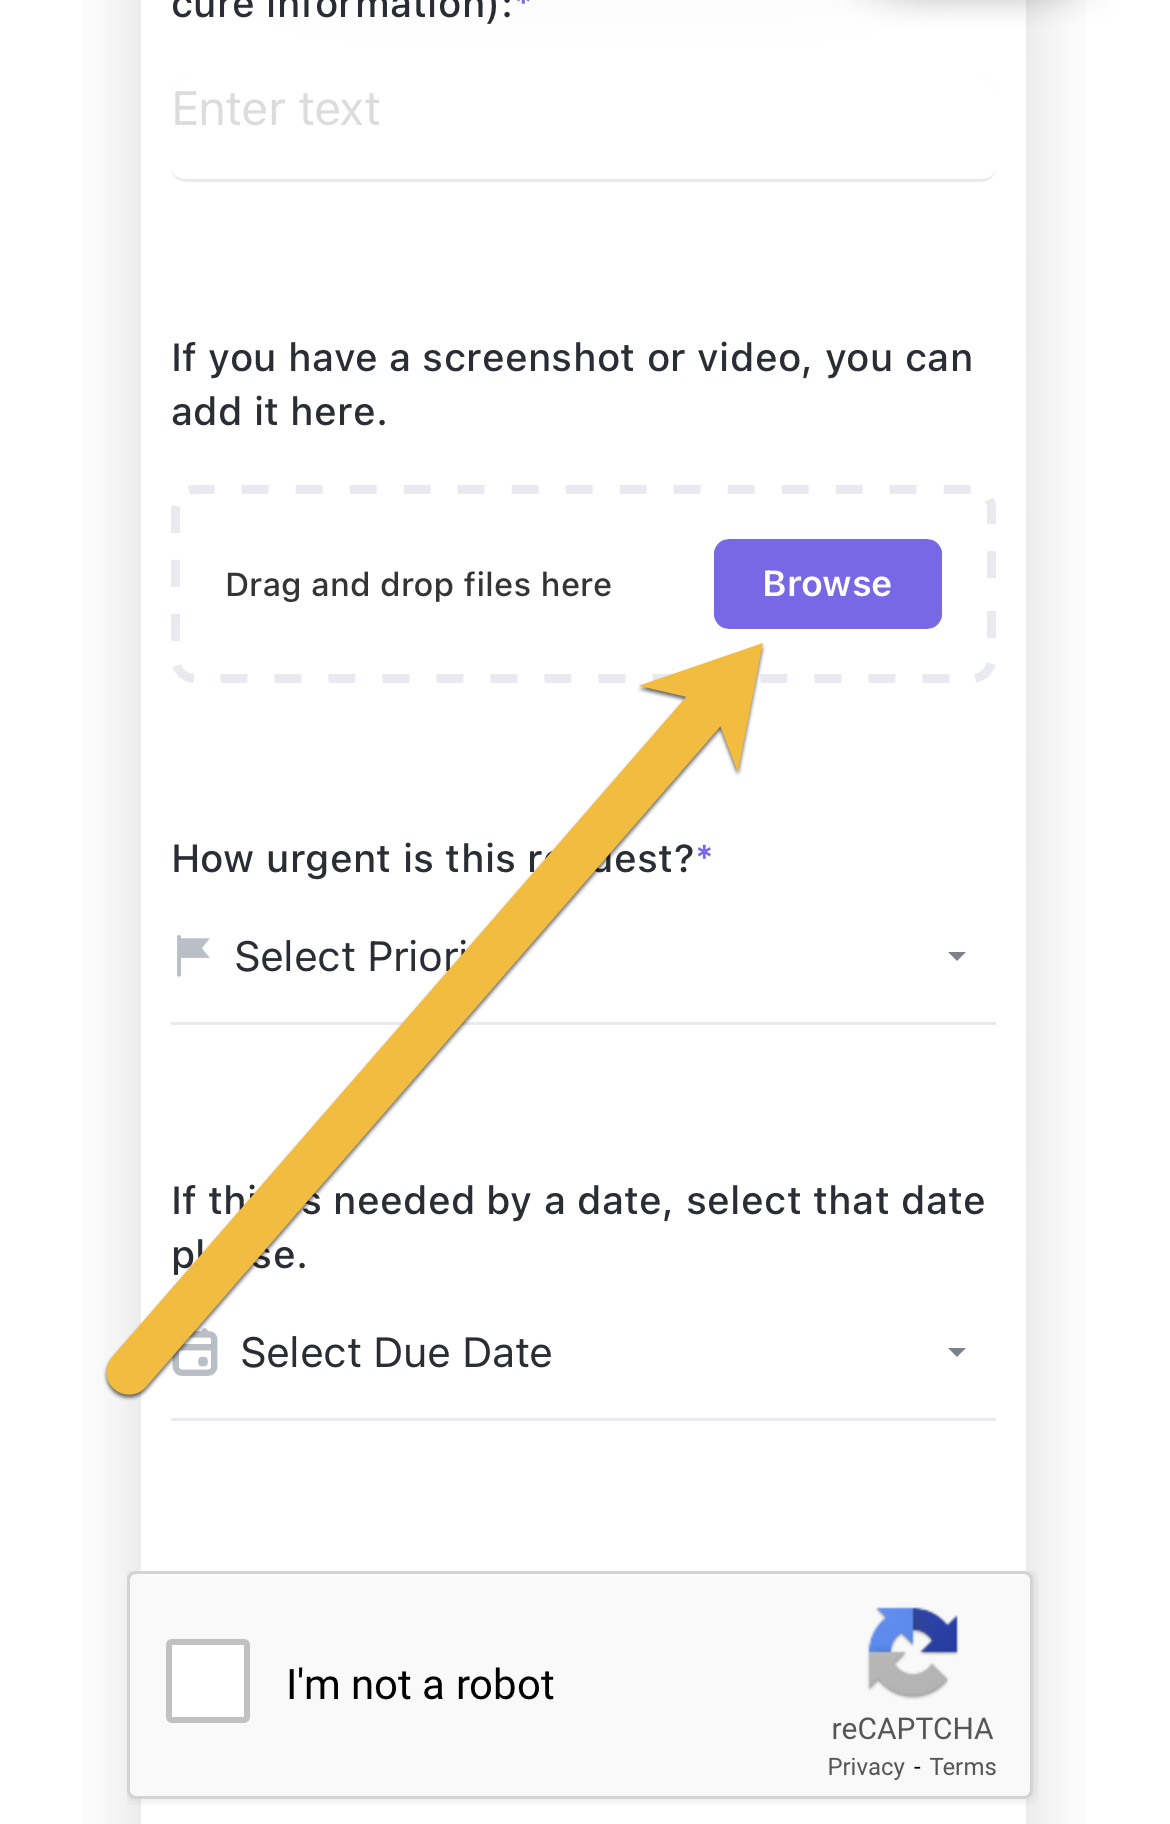
To attach the image to the form, be sure to use your iPad or iPhone to complete the form.
In the Drag and Drop Files Here location of the form, tap the Browse button.
Tap Photo Library
Locate and tap the Screenshot or Screen Recording you want to add